WIFI Module - Make ESP32 to act like a WiFi
Turn your ESP32 into a WiFi access point with this step-by-step guide! Learn to set custom credentials, connect devices, and control the built-in LED remotely. Perfect for IoT beginners, this tutorial includes example code and practical tips for easy setup.
Alright, previously, we connected our ESP32 to a WiFi, and turned on and off the inbuilt LED.
Now, we will make ESP32 to act as a WiFi, it will have it's own username and password. Using that credentials, we can connect our phone or computer to ESP32. And from phone or computer we will turn the inbuilt LED on and off.
Let's take a look at the diagram below that I drew myself.
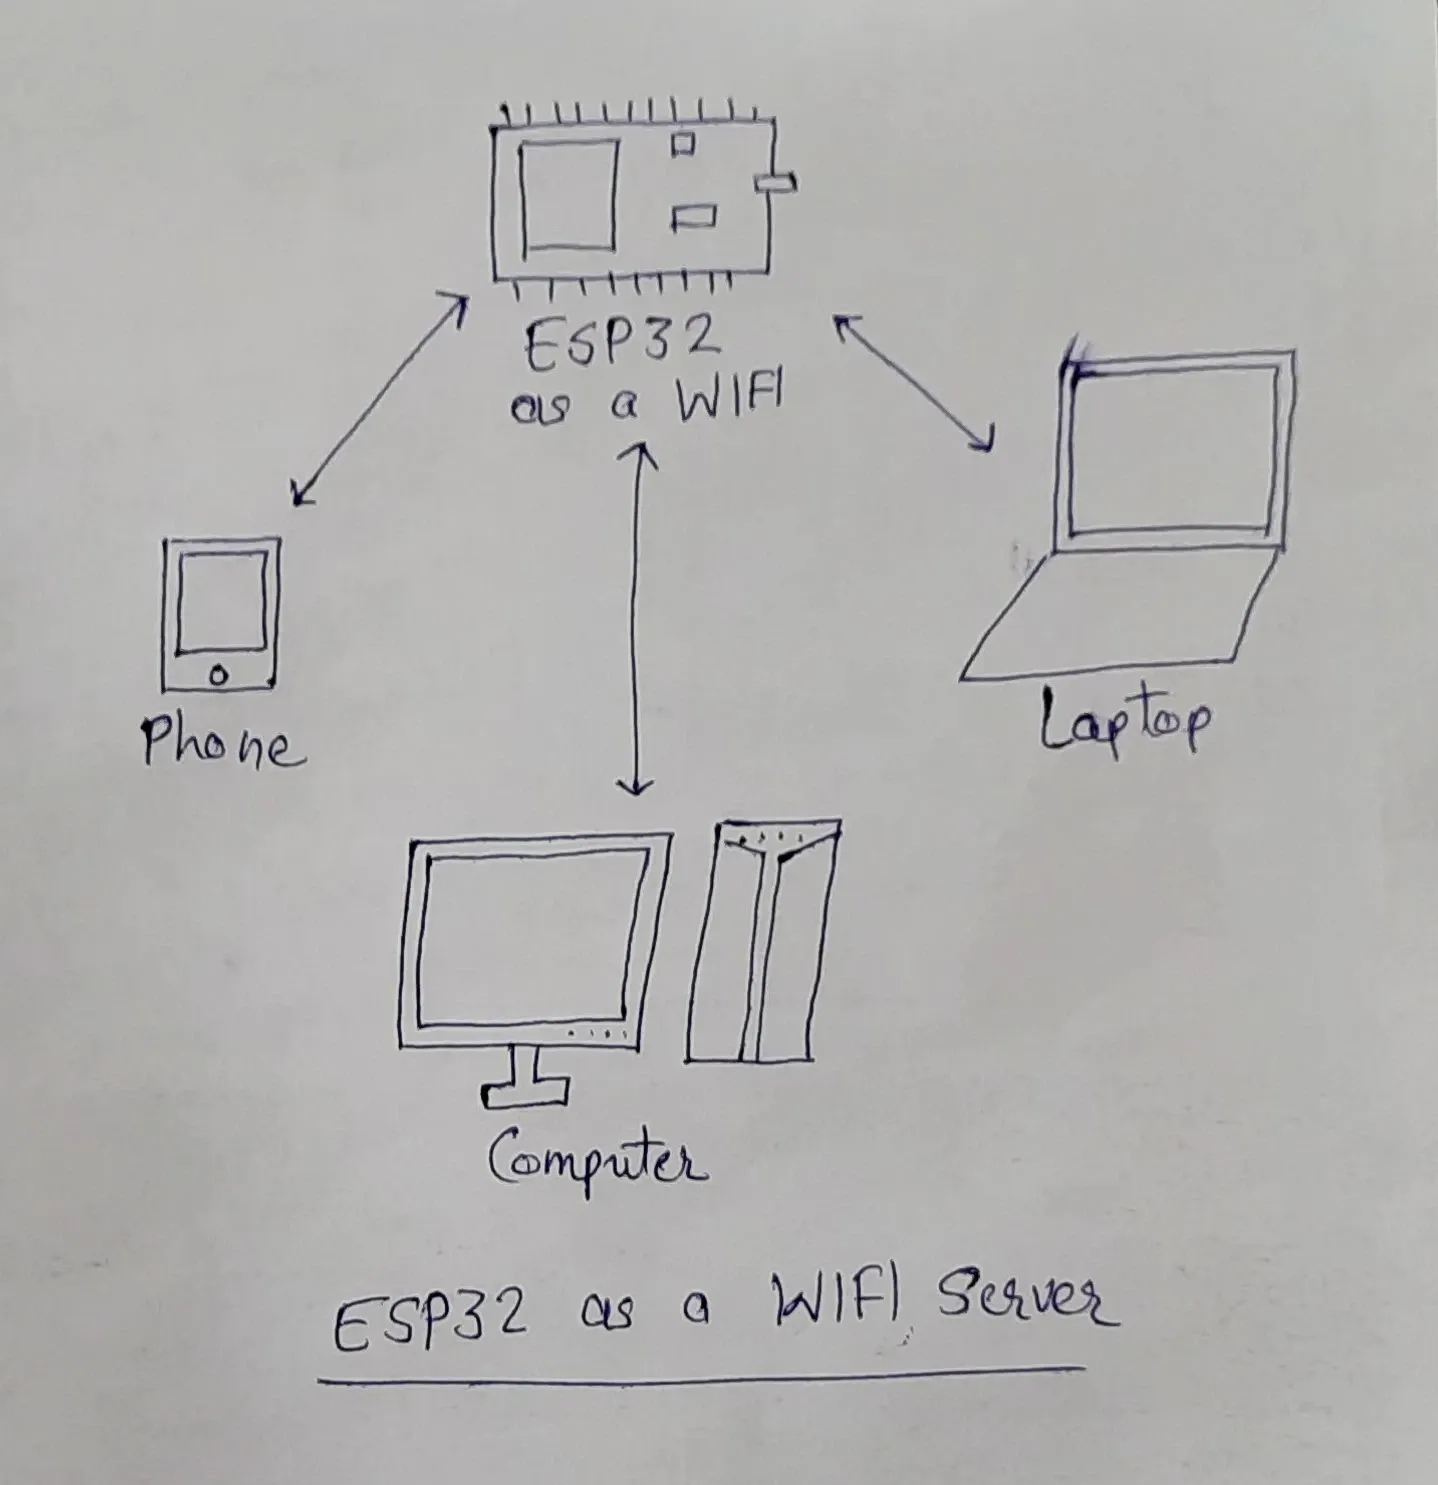
So, basically ESP32 acts as a WiFi, and we can connect our smart devices to it.
Example Code
The code below is also given in the Examples.
/*
  WiFiAccessPoint.ino creates a WiFi access point and provides a web server on it.

  Steps:
  1. Connect to the access point "yourAp"
  2. Point your web browser to http://192.168.4.1/H to turn the LED on or http://192.168.4.1/L to turn it off
     OR
     Run raw TCP "GET /H" and "GET /L" on PuTTY terminal with 192.168.4.1 as IP address and 80 as port

  Created for arduino-esp32 on 04 July, 2018
  by Elochukwu Ifediora (fedy0)
*/

#include <WiFi.h>
#include <NetworkClient.h>
#include <WiFiAP.h>

#ifndef LED_BUILTIN
#define LED_BUILTIN 2  // Set the GPIO pin where you connected your test LED or comment this line out if your dev board has a built-in LED
#endif

// Set these to your desired credentials.
const char *ssid = "my esp32";
const char *password = "secretpassword";

NetworkServer server(80);

void setup() {
  pinMode(LED_BUILTIN, OUTPUT);

  Serial.begin(115200);
  Serial.println();
  Serial.println("Configuring access point...");

  // You can remove the password parameter if you want the AP to be open.
  // a valid password must have more than 7 characters
  if (!WiFi.softAP(ssid, password)) {
    log_e("Soft AP creation failed.");
    while (1);
  }
  IPAddress myIP = WiFi.softAPIP();
  Serial.print("AP IP address: ");
  Serial.println(myIP);
  server.begin();

  Serial.println("Server started");
}

void loop() {
  NetworkClient client = server.accept();  // listen for incoming clients

  if (client) {                     // if you get a client,
    Serial.println("New Client.");  // print a message out the serial port
    String currentLine = "";        // make a String to hold incoming data from the client
    while (client.connected()) {    // loop while the client's connected
      if (client.available()) {     // if there's bytes to read from the client,
        char c = client.read();     // read a byte, then
        Serial.write(c);            // print it out the serial monitor
        if (c == '\n') {            // if the byte is a newline character

          // if the current line is blank, you got two newline characters in a row.
          // that's the end of the client HTTP request, so send a response:
          if (currentLine.length() == 0) {
            // HTTP headers always start with a response code (e.g. HTTP/1.1 200 OK)
            // and a content-type so the client knows what's coming, then a blank line:
            client.println("HTTP/1.1 200 OK");
            client.println("Content-type:text/html");
            client.println();

            // the content of the HTTP response follows the header:
            client.print("Click <a href=\"/H\">here</a> to turn ON the LED.<br>");
            client.print("Click <a href=\"/L\">here</a> to turn OFF the LED.<br>");

            // The HTTP response ends with another blank line:
            client.println();
            // break out of the while loop:
            break;
          } else {  // if you got a newline, then clear currentLine:
            currentLine = "";
          }
        } else if (c != '\r') {  // if you got anything else but a carriage return character,
          currentLine += c;      // add it to the end of the currentLine
        }

        // Check to see if the client request was "GET /H" or "GET /L":
        if (currentLine.endsWith("GET /H")) {
          digitalWrite(LED_BUILTIN, HIGH);  // GET /H turns the LED on
        }
        if (currentLine.endsWith("GET /L")) {
          digitalWrite(LED_BUILTIN, LOW);  // GET /L turns the LED off
        }
      }
    }
    // close the connection:
    client.stop();
    Serial.println("Client Disconnected.");
  }
}
Then basically you just run the code. First verify the code and then upload it to ESP32. Just select the board and port as we did in the first article.
Notice that I have set the username and password my esp32 and secretpassword respectively.
Serial Monitor
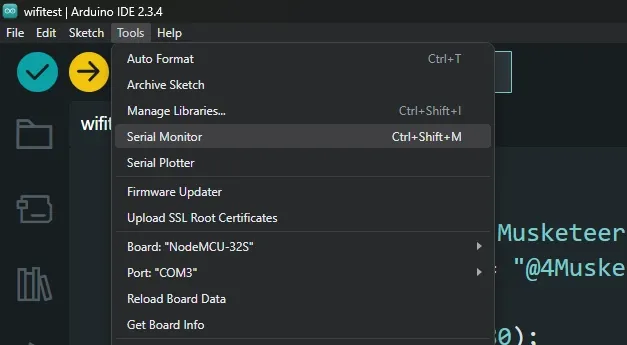
Once the code is uploaded, we can open the Serial Monitor from Tools > Serial Monitor .
Then change the baud to 115200 .
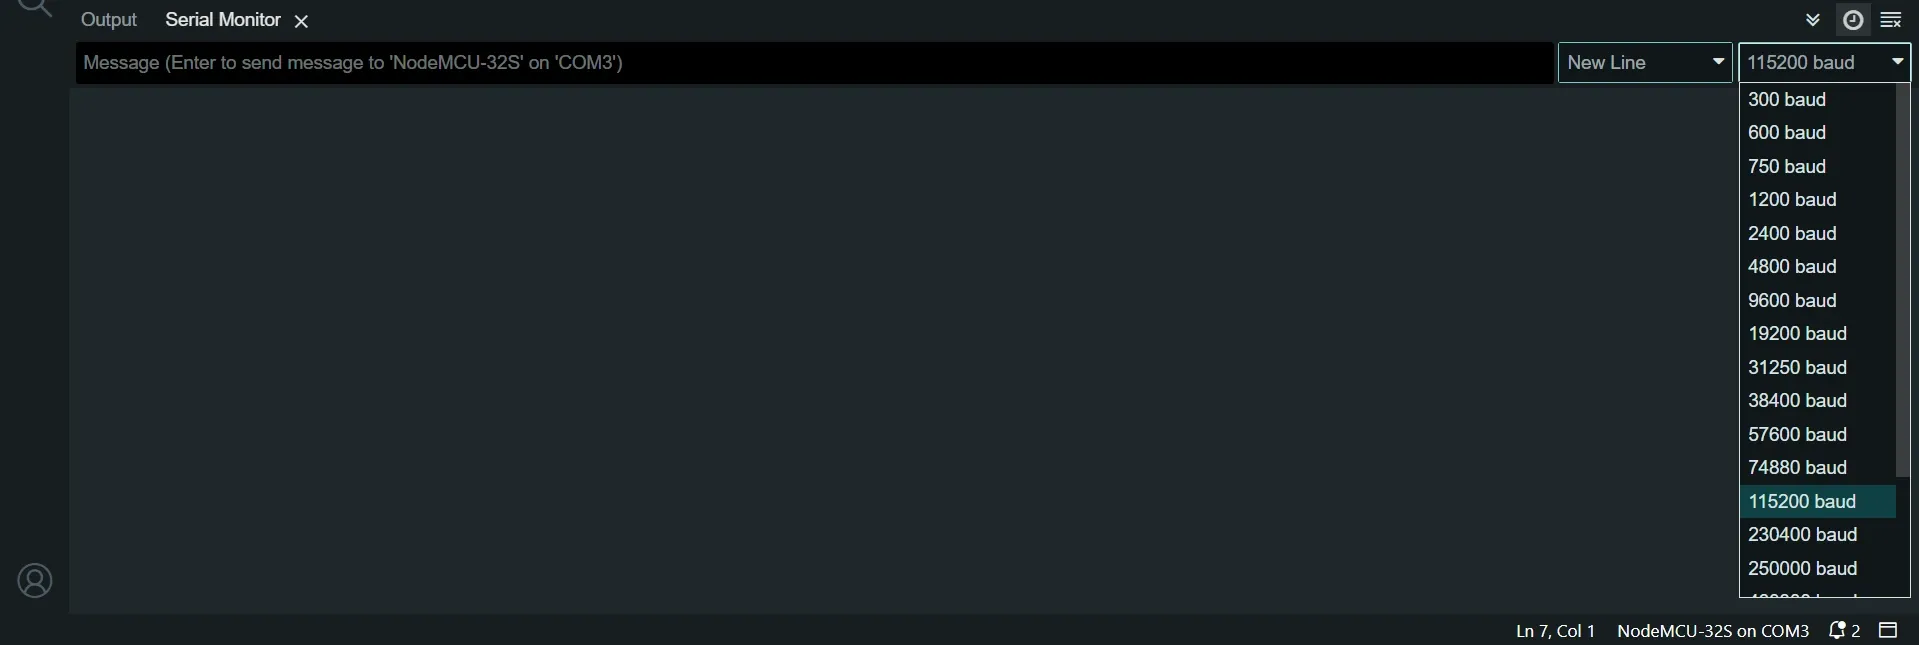
It did not show the previous messages, so we can just re-upload the code, and then it will log some messages.
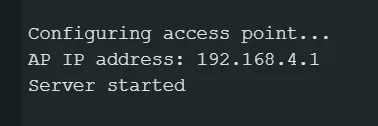
It says WiFi connected and then shows the IP address 192.168.4.1 which might be different for you. But whatever the address is, open it in a browser (Chrome in my case). Make sure you are connected to the ESP32's WiFi.
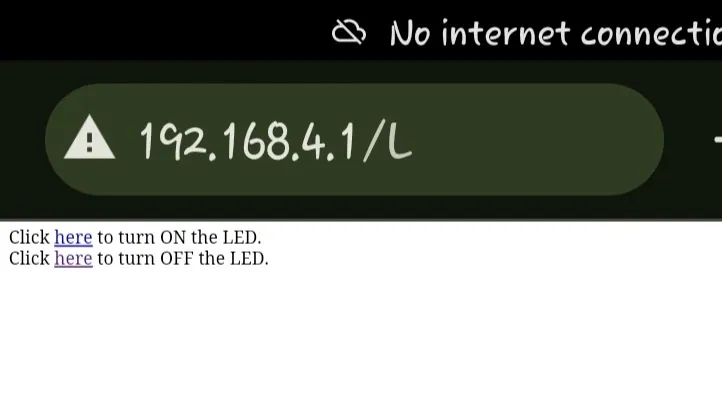
We can just press the On or Off links to turn the LED on or off. How cool is that. So, any device that is connected to ESP32 using WiFi, can turn the LED on or off.
Thank you very much for reading, see you in the next one.
Make sure to subscribe to the newsletter to receive emails whenever I post a new article.
Thank you very much.